HMS Goliath
"Damn the Dardanelles! They will be our grave!"
Admiral Lord "Jacky" Fisher
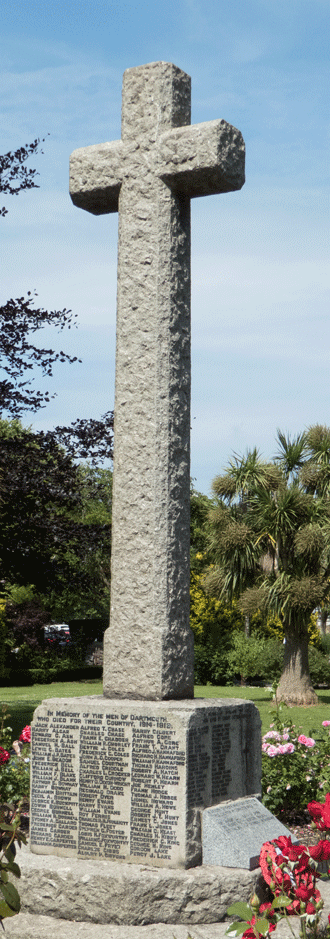
Four men commemorated on Dartmouth memorials died on 13th May 1915 when HMS Goliath was sunk in the Dardanelles:
Their individual stories are published separately. This article describes the history of their ship, HMS Goliath, and her activities in what was, for her and most of the men on her, a contribution of only twenty days to the Dardanelles operation. In parallel we have also published a timeline for "Gallipoli and the Dardanelles", which gives an overview of key events and provides a context for these and other losses experienced by the Dartmouth community during the course of this campaign.
The Canopus Class
HMS Goliath was a "Canopus class" battleship launched in 1898. The Canopus class of battleships (Albion, Canopus, Glory, Goliath, Ocean and Vengeance) were pre-dreadnoughts, designed by Sir William White, the Director of Naval Construction, for use in the Far East to counter the expanding Japanese navy. So that they could pass through the Suez Canal, they were smaller and lighter than their predecessors, the "Majestic class". In particular, they carried less armour, though the type of armour used was more protective for a given weight. They also had water-tube boilers, which generated more power at less expense in weight, and "fore and aft funnels", rather than the side by side arrangements of predecessor battleships (like the Majestics).

Before the war
HMS Goliath was commissioned in 1900 and duly took up her post on the China Station. However, after the alliance in 1905 between Britain and Japan allowed the number of ships on the China Station to be reduced, Goliath was recalled. She was attached first to the Mediterranean Fleet, then the Channel Fleet, and then the Home Fleet.
Although only fifteen years old (since date of launch) she was already obsolete in 1913, due to the rapid advances in warship design. In that year, she was mothballed and joined the Reserve Fleet; but at the outbreak of war, returned to full commission. Consequently, many of her crew were reservists; William Tucker had retired from the Navy in 1904, William Chorley in 1912, and Richard Hannaford in 1913.
Also joining HMS Goliath were several cadets from the Royal Naval College. The following appear on the ship in the Navy List for November 1914:
Please see our article "The Unjust Load" for more on Dartmouth Cadets and the First World War.
Wartime service
At the beginning of the war Goliath was assigned to the Channel Fleet. She covered the landing of the Plymouth Marine Battalion at Ostend, Belgium, for several days in late August, and then was employed on patrol and shipping examination duties in the English Channel. In mid-September Goliath left home waters for India, via the Bay of Biscay, Gibraltar, Malta, the Suez Canal, and Aden. She reached Bombay on 16th October.
Two Dartmouth cadets wrote accounts of their time on the ship. Wolston Weld Forester (with his mother's help) wrote a memoir "From Dartmouth to the Dardanelles", published anonymously in 1916. Ronald Murray (who subsequently became an Admiral) wrote a journal now held in the Imperial War Museum. Both refer to suffering from extreme heat in the Gulf of Suez and the Red Sea, but there were also some amusements; Ronald Murray described a seabird kept in a cardboard box and fed sardines, and Weld Forester the sights of flying fish and a shark: "The water was so clear that every detail of his long, wicked-looking body was distinctly visible".
Goliath coaled at Bombay and then sailed almost immediately with HMS Swiftsure as escort to a large convoy of troop transports. About a week out, the convoy separated. Goliath escorted half the convoy down towards Mombasa, where the Bangalore and Imperial Service Brigades were to be deployed in the campaign against German forces in East Africa. The journey was uneventful apart from crossing the Equator on 28th October 1914, with the usual ceremonies:
The Sea King, gorgeously arrayed in red and yellow bunting, with a cardboard crown set on his hempen wig, asks each in turn if he has ever crossed the line before, but no sooner does the unfortunate open his mouth to reply, than a large brush dripping with whitewash is slapped in his face! He is then liberally whitewashed all over by Neptune's merry men and tipped over backwards into the bath.
Weld Forester records that when the whitewash ran out, a mixture of black paint, sand and water was used instead. Perhaps William Chorley as a Painter 1st Class had a central role in this ceremony.
The convoy arrived at Mombasa on 1st November and at this point Goliath's war became more eventful. The German light cruiser Koenigsberg, which had sunk HMS Pegasus in September, and was a potential threat to such convoys, was under blockade in the Rufiji river (now in Tanzania, then in German East Africa). Goliath, together with HMS Fox, was ordered to attack the port at Dar-es-Salaam, the principal port of German East Africa, in case coaling ships and other small craft were used to supply the Koenigsberg.
On 28th November 1914, small naval vessels were sent in to the harbour to destroy any such ships. Prior warning was given, so their crews could be taken off, and civilians given protection. However, as the British boats were leaving, they were fired on, though the harbour authorities were still flying the white flag. Goliath then bombarded the town, destroying many buildings.
During the operation Goliath's second in command, Commander Henry Peel Ritchie, was severely wounded, but took his boat out of the harbour nonetheless, winning a VC for his bravery. Several other members of the crew were also badly wounded. Two days later, in reprisal, Goliath and Fox bombarded Dar-es-Salaam again.
Following this Goliath sailed for Simonstown, in South Africa, to refit, allowing the crew some "rest and recuperation" - the ship's log for January and most of February shows her in Simonstown for the whole of this period. On 25th February 1915, she sailed once more for East Africa, to strengthen the small force blockading the Koenigsburg, and with the ultimate aim of destroying the ship. She carried out a bombardment of the East African town of Lindi on 20th March, but before she could make any more significant contribution to this objective she was ordered on 27th March to the Dardanelles, to support the military invasion of Gallipoli peninsula. We have published alongside this article a timeline of the key events leading up to, and including the landings.
At this point Ronald Murray was transferred to HMS Hyacinth, which remained with the blockading force (eventually Koenigsburg was so severely damaged that she was scuttled by her own crew on 11th July 1915, though they were able to salvage all her main guns which subsequently contributed to German forces in East Africa). The remainder of his journal covers events off East Africa, and he avoided the fate of several of his contemporaries.
Wolston Weld Forester, meanwhile, remained on the Goliath. The ship's logs show that on 2nd April she left Zanzibar for Aden, Suez and Port Said, and after an uneventful voyage, she arrived at the island of Tenedos on 23rd April. She joined a fleet of eighteen battleships, twelve cruisers and about twenty-four British and five French destroyers. According to the official naval history, there were also eight British submarines, including an Australian, and four French; and several fleet minesweepers and trawlers used for minesweeping. For the landings there were in addition transports, lighters, tugs and other auxiliary craft.
The official naval history explains that each zone of the landing operation was to be provided with a separate naval squadron, of "covering ships" and "attendant ships". The "covering ships" were to prepare for the landing with their fire, and subsequently to cover it by bombarding the enemy's trenches and batteries in land. The "attendant ships" were to carry the advance echelons of troops who were to seize the beaches and get to a position in which they could then cover the completion of the landing.
The main landings took place at Cape Helles, the toe of the peninsula, and Goliath was part of the covering squadron for them. The attack had been fixed for 23rd April, but bad weather postponed it until two days later. Five beaches were selected, from east to west: S, V, W, X and Y.
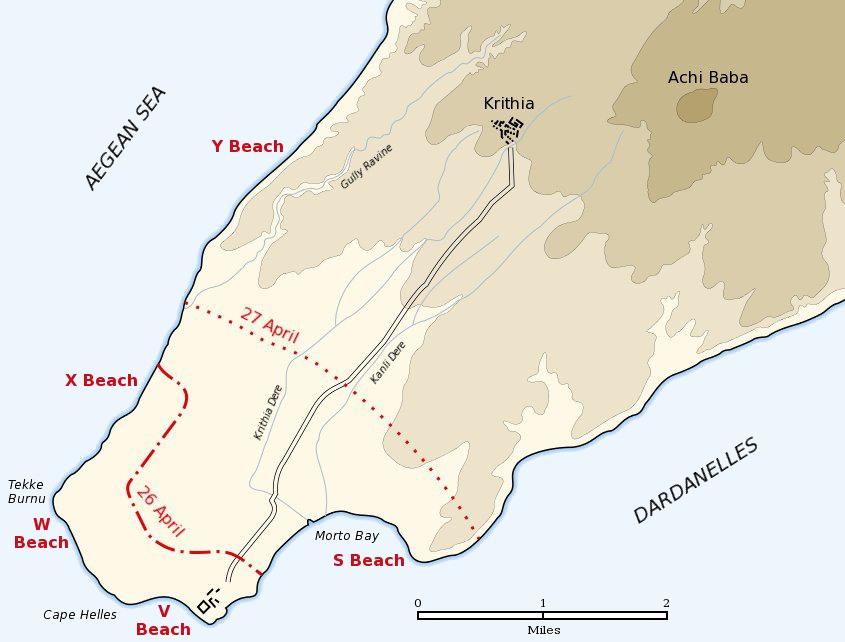
In addition, ANZAC forces landed further up the western coast, at Gaba Tepe; at the narrowest point of the peninsula, at Bulair, the Royal Naval Division staged a diversion, while the French landed at Kum Kale on the Asiatic side of the straits.
The Landing at Y Beach
On 25th April Goliath covered the landing on Y Beach. The naval history describes the process of the landing, which went well:
At about 2.30 am at a rendezvous four miles west of the landing place, two companies of the Kings Own Scottish Borderers, which formed the advanced guard of the covering force, were transferred to four trawlers ... The rest of it, consisting of the remainder of the battalion and one company of the South Wales Borderers, remained in the Sapphire and Amethyst, while the Plymouth Marine battalion stood fast in their transport. At 4.00 am while it was still dark, the trawlers shoved off, and with the Sapphire and Amethyst on either flank began to make for the shore in line abreast, each towing six boats. At 2000 yards from the beach the two light cruisers took up stations to support the flanks, while the Goliath got into position between 4000 and 5000 yards off the shore ....Not a sound broke the stillness, till about 5.00am, when they were close to the shore, the guns of all the ships disposed around the end of the peninsula suddenly proclaimed that the great attack had begun ...Undisturbed, the troops reached the shore in perfect order... Scouts were soon at the top [of the cliff] reporting no enemy in sight [for no defences had been constructed at the point of the landing]. The Marines' transport was at once ordered in, the trawlers quickly returned to the cruisers for the rest of the covering force, and by 6.20am the whole of it was on the top of the cliff without a single casualty or trace of opposition. ... By 7.15am [the Marines] too had landed.
The landing force waited for instructions to advance further towards the town of Krithia, to which they were very close, but these did not come. Late in the afternoon, Ottoman infantry counter-attacked; to begin with, the attack was dispersed by naval gunfire, but after dark, when naval gunfire stopped, the attack was renewed. By dawn both sides had suffered heavy casualties but the British position on the cliff-top was still held.
However, due to what the naval history calls "a serious misunderstanding", troops on the beach had already started to re-embark, without the knowledge of those holding the cliff; and because of this, even though a further Ottoman attack was held off that morning, the troops on the cliff-top were evacuated also. By 11am on 26th April, Y beach had been left behind. Goliath, along with other ships, then took troops back to the transport ship.
Weld Forester did not write about his experience at Y beach. His mother, Elspeth, wrote in the memoir: "I think he felt it too big a thing to tackle ... one morning he was sent away in his boat to fetch the wounded from the beach ... other midshipmen were doing the same thing in other boats. Batch after batch of men horribly wounded, hideously mutilated, were rescued under fire, and conveyed to the hospital ships ..."
On 28th April Goliath was standing off X beach. Two days earlier the landing there had also been successful, and British forces had been able to push inland and take a position above the beach. They had held off an Ottoman counter-attack and been reinforced. At the other Cape Helles beaches there had been very heavy casualties, but landings had nonetheless been achieved, and the positions consolidated. Ottoman forces had withdrawn to a line in front of Krithia and the hill fort of Achi Baba above it.
On that day the Allied forces made their first attempt to advance to capture Krithia. The naval history says: "Everything the ships could do to break the deadlock they did. They were all firing hard. Goliath had been ordered to move in and use her 12 pounders at the closest possible range". Her ship's log records her bombarding the north slopes of Achi Baba.
However, the First Battle of Krithia, as it came to be called, ended in failure, with Allied forces no further forward, and many casualties. Goliath's logbook shows that on 29th April she again bombarded the slopes of Achi Baba and the Krithia Road, though less heavily than the day before.
On 30th April, there were signs of an Ottoman attack developing on the Suez Canal, and Goliath was detached to go to Port Said. However, the French Navy was able to make ships available at the canal, so Goliath was recalled to the Dardanelles.
Goliath's log-book for May went down with her, so the principal source for what happened next appears is the naval history. It appears that at the time of the second Battle of Krithia, between 6th-8th May, Goliath was not involved as she was due to coal. During that battle, the French, on the right of the Allied line, had gained a position at the Kereves Dere (a "dere" being a gully running from Achi Baba towards the Cape) but continued to suffer Ottoman attack and so had made a special request for ship support. According to the official naval history:
Every evening two battleships were sent in, and on the night of May 12th-13th the ships detailed for the duty were the Goliath and the Cornwallis. The Goliath anchored off Morto Bay and the Cornwallis astern of her. Above De Tott's battery was a protecting patrol of two destroyers, Beagle and Bulldog, while the other subdivision, Wolverine and Scorpion, were on guard on the opposite side in Eren Keui Bay, and in mid-channel was the Pincher.
The night was very still and dark, there was no moon, and about midnight to increase the obscurity a fog began to roll down the Asiatic shore and spread across the Straits. It was an ideal opportunity for a torpedo attack, and it was noticed that except far up in the Narrows, the enemy's searchlights were not working as usual. Orders were therefore issued for special vigilance ... That day Lieutenant Commander Firle, a German officer, had begged leave to make attempt to check the flanking fire of the British ships which each night was proving so disturbing to the Turks at Kereves Dere ...After sunset he started down the Straits in the Turkish destroyer Muavenet-i-Miliet...
Keeping as close under the cliffs of the European shore as the depth of water would allow, and going dead slow, he was able towards 1.00 am to steal past the Bulldog and Beagle without being detected ... as he crept on ... he was detected from the bridge of the Goliath. The night challenge was made to him, he flashed some kind of a reply, the challenge was repeated and then he could be seen to dash ahead, the order to fire was given but before three rounds could be got off a torpedo hit the old battleship abreast of the fore turret. Almost immediately another got home abreast the foremost funnel. By that time she was already listing badly to port, and the list rapidly increased till she was nearly on her beam ends, when a third torpedo struck her near the after turret.
The attack had been carried out as skilfully as it had been daringly conceived. No ship could survive such punishment, and so rapidly had the blows followed one upon the other that before most of those below could reach the deck she turned turtle, and after floating so a couple of minutes she plunged under, bows foremost. Of her assailant nothing could be seen. She had sped away into the darkness, but as craft of all kind hurried to the spot, and tried to rescue the survivors her exultant wireless signals could be heard up the Straits: "Three torpedo hits! Sunk, sunk, an English battleship sunk".... Wolverine .. and Scorpion went to cut off the invisible enemy's retreat ...but nothing more was seen of the Turkish destroyer. Meanwhile the work of rescue was proceeding. In the intense darkness and the swift current it proved very difficult.
In his memoir, Wolston Weld Forester vividly described the rapid sinking of the ship in the middle of the night:
Crash! Bang! - Cr-r-r-ash! I woke with a start, and sitting up in my hammock gazed around to see what had so suddenly roused me. Some of the midshipment were already standing on the deck in their pyjamas - others, like me, were sitting up half dazed with sleep. A party of ship's boys crowded up the ladder from the gun-room flat, followed by three officers; one of these, a sub-lieutenant RNR, called out: "Keep calm, and you'll all be saved".
Up to that moment it had never dawned upon me that the ship was sinking, and even then I thought it improbable until I noticed that we were already listing to starboard. Then I got up and walked up the hatch to the quarter-deck. The ship was now heeling about five degrees to starboard, and I climbed up to the port side. It was nearly pitch dark ....
Inside the ship everything which was not secured was sliding about and bringing up against the bulkheads with a series of crashes ... she had heeled over to about twenty degrees, then she stopped and remained steady for a few seconds. In the momentary lull the voice of one of our officers rang out steady and clear as at "divisions": "Keep calm, men. Be British!"
Then the ship started to heel rapidly again, and I felt sure there was no chance of saving her. I turned to jump overboard... Raising my arms above my head I sprang well out board and dived. Just before I struck the water my face hit the side of the ship. It was a horrid feeling sliding on my face down the slimy side, and a second later I splashed in with tremendous force, having dived about thirty feet.
Just as I was rising to the surface again a heavy body came down on top of me. I fought clear and rose rather breathless and bruised. I swam about fifty yards away, to get clear of the suction when the ship went down; then, turning round and treading water, I watched her last moments. The noise of crashing furniture and smashing crockery was continuous. Slowly her stern lifted until it was dimly outlined against the deep midnight sky. Slowly her bows slid further and further under until, with a final lurch, she turned completely over and disappeared bottom upwards in a mass of bubbles.
She had been our home for nearly ten months - she was gone - vanished - in less than four minutes.
Weld Forester, who was a good swimmer, was eventually picked up by a cutter from the Lord Nelson, and taken to Mudros, and from there, taken home to England.
The News Reaches Dartmouth
The Dartmouth Chronicle of 14th May 1915 carried a report of Winston Churchill's announcement the previous day to the House of Commons:
In the House of Commons yesterday Mr Churchill said he regretted to say the Admiralty had just heard from the Admiral at the Dardanelles that the battleship Goliath was torpedoed on Wednesday night in a torpedo attack by destroyers when protecting the French flank, just inside the straits.
Twenty officers and 160 men were saved, which he feared meant that over 500 lives had been lost.
The naval history states that "of the Goliath's complement of 750, nearly 570 were lost, and amongst them, her captain". The Gallipoli Association states that varying lists exist of the crewmen of HMS Goliath who died, and shows a list of 504 names.
At the time, there was considerable uncertainty about the impact, due in part to some crew having survived. On 21st May 1915 the Chronicle reported:
It is feared that several households in Dartmouth have been bereaved by the loss of HMS Goliath in the Dardanelles.
The crew included 1st Class Petty Officer W H Tucker of Orange Dell, Victoria Road. He belonged to the Royal Naval Reserve, and prior to the general mobilisation of the Forces was on duty at the Royal Naval College. The sad news has been received by his relations that he was not among the survivors. He leaves a widow and several children.
Richard Henry Hannaford, 1st Class PO, lived at 2 Carnhill Terrace Victoria Road, and no news of his rescue has been forthcoming. He formerly lived at Brixham, but since retiring on pension he obtained employment at the Royal Naval College Dartmouth. The widow is the niece of the late Captain and Mrs Robert Popham, of King Street, Brixham. There are several children.
Mr Charles Rushton, who lives at Dart View Terrace, was fortunately rescued, and news to that effect has been received by Mrs Rushton. He is a petty officer. Before his retirement from the Navy he was for many years the coxswain of the captain's gig, serving the same officer in that capacity on several commissions. He has two sons in the merchant service.
Mr Royal W Roope, who was also a member of the crew of the Goliath, also lived at Dartmouth. He discharged the duties of a Yeoman of Signals.
Finally, on 28th May 1915, the Chronicle carried four announcements of men lost on HMS Goliath, for:
Also lost were three of the Dartmouth cadets: Torquil Macleod, who was picked up unconscious but died on one of the rescue boats; Ronnie Faed, his best friend, who drowned; and Charles Bartlett, whose father was a senior captain with the White Star Line.
Postscript
The loss of Goliath appears to have been the event that precipitated the final crisis that led to the resignation of the First Sea Lord, Admiral Lord "Jacky" Fisher; to the replacement of Winston Churchill as First Lord of the Admiralty a few days later; and ultimately to the creation of a new coalition government. But the Dardanelles campaign continued for many months; Dartmouth did not have long before suffering more loss.
Sources
History of the Great War, Naval Operations, Volumes 1, II and III, by Sir Julian S Corbett, publ Longmans London 1923, accessed on naval-history.net
From Dartmouth to the Dardanelles, A Midshipman's Log, Edited by His Mother, Heinemann, London 1916, accessible online
Journal of R G Murray (later Rear Admiral R G Murray CB CBE)
Operation at Dar-es-Salaam and further information on Commander Henry Ritchie VC
HMS Goliath's ship's log January-March 1915, available on naval-history.net
Article on "The Schoolboy Sailors who died at Gallipoli" by Andrew Thomson, BBC News Magazine
Charles Sydney Ellis Bartlett is commemorated on the Merseyside Roll of Honour
A list of those lost on HMS Goliath may be seen on the website Maritime Quest and photos and information about many of them are available on the website message board
The Gallipoli Association also has an index of the fallen crewmen of HMS Goliath
A list of casualties and survivors is available on naval-history.net