The Battle of Loos
"The ill-fated Loos offensive was undertaken directly against the opinion of Haig, the man who, as Commander of the First Army, had to carry it out".
Sir Basil Liddell-Hart, 1930
The Background
In the summer of 1915, the principal opponents of German forces on the Western Front were the French - British forces were subsidiary. Sir John French, overall commander of the British Expeditionary Force, had an independent command, but his role in that command was to support General Joffre, commanding the French forces. Joffre's plan to break the stalemate which had resulted from the campaigns in 1914 was a double push in Artois and Champagne, to the north and south of the Noyon salient - the large bulge in the position of the German front line, around Noyon. He believed that, with simultaneous attacks on each side, there could be a breakthrough, which would allow the Germans to be pushed back and the "war of movement" to resume.
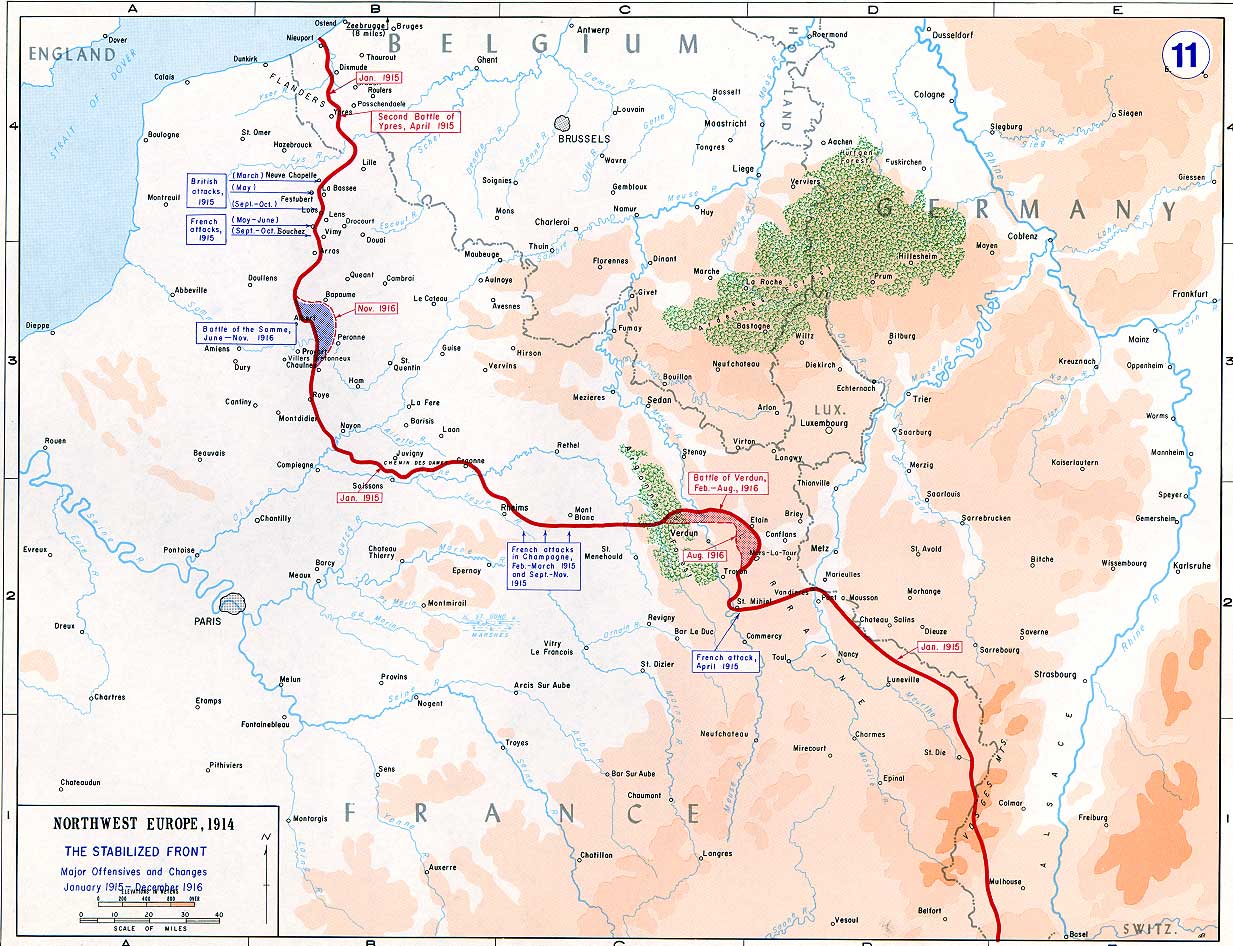
Earlier in 1915, the British First Army had fought at Aubers Ridge and Festubert in support of a French attack in Artois. Despite heavy casualties and small gains, Joffre did not abandon his overall strategy and now planned a third offensive - to which British forces were once again required to contribute. The plan was for the French Tenth Army to attack between Lens and Arras. Joffre wanted the British to attack along the sector of the line north of Lens up to the La Bassee canal, a front of about 20 miles, running roughly north-south, in one of the most important coal mining regions of France.
In July, at an inter-Allied conference, Kitchener told the French that, though British forces would gain twenty-five new divisions by the end of 1915, he wanted to integrate them fully into the British Expeditionary Force before taking part in any offensive. However, he had to think again when Joffre told him that the French people were "getting tired of the war" and that, if disaffection was to be countered, vigorous effort was required sooner than 1916. Kitchener was also influenced in his shift of opinion by wider developments - the collapse of Russia on the eastern front, the failure of the Allied initiative in the Dardanelles, and the Italians facing defeat against the Austrians. He therefore agreed to a joint Anglo-French assault for the autumn.
Sir Douglas Haig, in command of First Army, had already reviewed the ground, and disliked what he saw. In his report to Sir John French, he said:
The ground, for the most part bare and open, would be so swept by machine-gun and rifle fire, both from the German front trenches and the numerous fortified villages immediately behind them that a rapid advance would be impossible .. The enemy has excellent observing stations for his artillery... [his] defences are now so strong that, sufficient ammunition lacking to destroy them, they can only be taken by siege methods; that is, by using bombs, and by hand to hand fighting in the trenches - the ground above is so swept by gun and machine gun and rifle fire that an advance in the open, except by night, is impossible.
He proposed alternative locations for the attack, and an alternative plan for the attack to be made mostly with artillery "to assist the French by neutralizing the Enemy's artillery, and by holding the hostile infantry on my front".
General Joffre, however, insisted on an all-out attack. Sir John French had no option but to agree or resign - committed by Kitchener to support the French, he agreed. Haig thus faced a battle over unfavourable ground, in which he had already said he feared "the sacrifice of many lives".
The Orders
Sir John French issued his orders on 18th September 1915. Two Corps, I and IV, would lead the assault. XI Corps, together with the Cavalry Corps and the Indian Cavalry Corps, were to constitute a strong reserve, under the personal command of Sir John French. Other subsidiary, diversionary attacks would take place north and south of the main battle area.
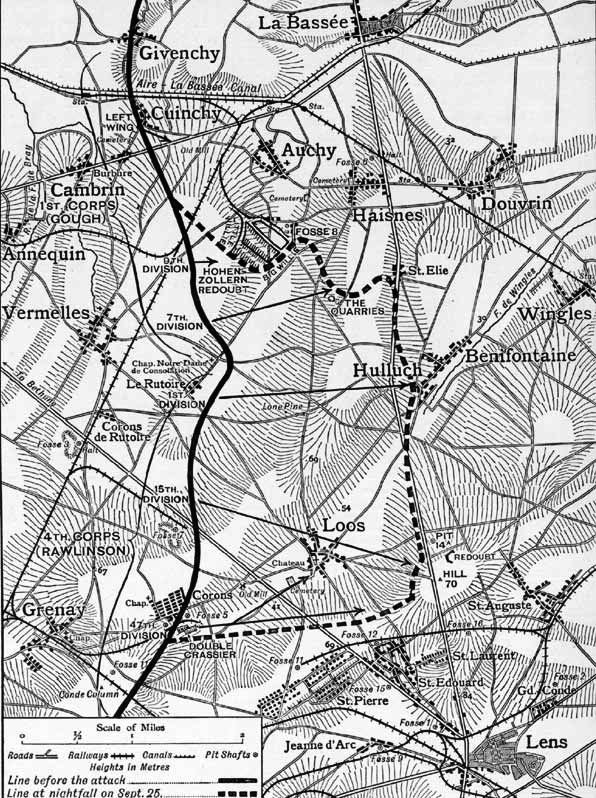
I Corps (which included the 8th and 9th Devonshires) was allotted the position on the left of the British front, from the La Bassee canal in the north, as far as the Hulluch-Vermelles road, which runs west-east and (roughly) bisected the battlefield.
IV Corps was allotted the position on the right, from the Hulluch-Vermelles round, southwards round the village of Loos, down to the railway running west from Lens.
IX Corps was held in reserve, under Sir John French's command, at Lilliers, some 15 miles away from the front-line, to be released as required.
The German front-line was strongly fortified. There were two lines of trenches dug deep into the chalk, with deep dugouts, sometimes fifteen or twenty feet below the surface. Both the first and second lines were reinforced by a chain of strongpoints, some of which were significant redoubts, or forts.
That such defences would require attack in strength was understood, but what had yet to be fully grasped was the extent of attacking strength required. Sir John French's orders included a four-day preliminary bombardment, starting at 7am on 21st September. Since Neuve Chapelle (March 1915) the importance of accurate and heavy artillery fire ahead of infantry attack was well-understood, and the number of artillery pieces available had been increased, but even so there was only one artillery piece per 23 yards of front - less than at Neuve Chapelle.
Further, although the quantity of munitions had been increased, far more was needed than was yet available, and the shells were often unreliable. Finally, gunnery had yet to develop the ability to fire against long-distance, unsighted targets - such as the defences in the German second line.
To compensate for insufficient fire-power, Sir Douglas Haig therefore intended to use a weapon previously untried by the BEF - gas. Gas had first been used by the Germans on the Western Front in April 1915, at the start of the Second Battle of Ypres. Kitchener had directed that the British develop a retaliatory capability. The Royal Engineers were given the task of developing the weapon - initially chlorine gas - and Royal Engineers "Special Companies" were formed in July 1915, from men with specialist experience, to operate the weapon in the field. It was referred to as "the accessory". Haig saw a limited demonstration of it on 22nd August and was sufficiently impressed to incorporate it within his overall plan. His estimate - or hope - was that gas could, in effect, double the effectiveness of his artillery.
However, chlorine gas required the right wind conditions and topography to be effective. Ideally, a light breeze blowing from the west would roll the gas toward the German lines, where it would (being heavier than air) sink into trenches and dugouts. German respirators were thought to provide protection for only 30 minutes so the release ideally required to take longer than this. But there were not enough gas cylinders to provide a continuous supply for long enough, so the deficiency was made up with phosphorous smoke candles, to look like gas and thicken the cloud.
Careful arrangements were made to stop the release of gas if the weather was unfavourable but in reality, there was little choice about the timing of the attack, which was driven by the timing of General Joffre's offensive. The attack had to go ahead, with or without the gas.
The Build-Up - the 8th Devonshires
The 8th Devonshires had landed in France on 25th July. For their story until 8th September, see Andrew Prettyjohn - the first of Dartmouth's young men to die, shot by sniper fire while out on a working party. The night of 8th September found them in billets at Verquigneul.
On 9th September they arrived at Les Harisoirs: "a restful place after the trenches". Rumours of a forthcoming attack were clearly swirling about as the author of the Battalion War Diary wrote on that day: "The attack which was to have come off on 11th is apparently postponed".
On 13th September they moved "unexpectedly" from Les Harisoirs for Verquin, and on 14th September left Verquin for Vermelles. The War Diary observed: "These are not billets at all, the entire town being in ruins".
On 15th, British artillery were active, and "It now looks as if the attack would take place about Saturday or Sunday".
On 16th September: "Germans shelled our billets at 9pm. MO had a very narrow escape with two stretcher bearers on way to aid one man ... the shell pitching 24' off him. Captain Bellward developed appendicitis. Eight of "B" Company got hit outside their billet by a shell - real bad luck." (It would seem that this did not involve any deaths).
On 17th September, they were back at Verquin, in "very crowded billets" which were "none too clean". There they stayed until 21st September "preparing for the attack to take place".
On 22nd September they left for Verquigneul and on 23rd September left Verquigneul for Vermelles "to go into trenches at 9.15pm on 24th for the attack which is due to take place on 25th".
The Battle
The attack was scheduled for 25th September - the assault was timed to start at 6.30am and the gas release for 5.50am.
The 8th Devons moved up into trenches for the attack at 9.15pm on 24th September, as planned. They were positioned roughly in the centre of the field, with the 2nd Gordons between them and the Vermelles-Hulluch road. Behind them were the 2nd Borders and behind the 2nd Gordons were the 6th Gordons. The 9th Devons were in brigade reserve.
Here the German trench systems were about a mile apart, the second line running through the villages of Hulluch, St Elie, and Haisnes, and, like everywhere else, strongly fortified. The German front line was known in this section as Breslau Trench.
The 8th Devons were in four lines: C company in the newly dug front-line, A and D company in the new support trenches, B company with battalion headquarters in the old front line. Five officers, the seconds in command of companies and the reserve machine-gun officer, were left behind with the transport as a reserve of officers, since no battalion was to take more than 20 officers into action. This, as it turned out, was a sensible precaution.
It seems that A and D companies actually started too soon, before zero hour, for at 6.30am, A, D and C "seemed to all go forward together in one line", according to the Battalion War Diary. Consequently there was much crowding at the gaps in the wire, and many casualties. The War Diary also says that "another result of the excessive speed with which the attack was started was that the front three companies seem to have caught up "Accessory No 1" (ie the gas) and casualties occurred from the effects of this".
In the assault on Breslau Trench, the German front line, every officer except three was either killed or wounded. Nonetheless, Breslau Trench was taken. The 8th Devons then focused on a position a little to their right, from which German guns were firing. Sergeant Northam of A Company led the charge, and the German gunners surrendered (according to the War Diary) or were killed (according to the Regimental History). Four field guns were captured, still overheated from their rapid fire.
The forward attack then continued to a cross-roads south of St Elie and west of Hulluch, on the Lens-La Bassee road. But by this time only a small part of the Battalion was left - the War Diary says about 100 and the Regimental History about 70, which it says were mostly from A and C companies, under Captain Gwynn and 2nd Lt Trott, the only officers now left. The Battalion had lost its machine guns, and no advance from the crossroads was possible, for British artillery was still shelling St Elie and Hulluch, and there were no reinforcements coming up. The 8th Devons therefore dug in, with the 2nd Gordons on the right, and no-one on the left. The position was held all day.
The 9th Devons, in the meantime had moved forward from the reserve trenches soon after 6.30am, but had been delayed due to the communication trenches being congested with returning wounded. Ultimately they climbed out of the communication trench and went forward over the open ground towards Gun Trench (the position where the guns had been captured). Thus exposed to German fire from several positions, they lost heavily. About 50 men, having reached Gun Trench, were collected by a few surviving officers and, at about midday, attempted to get forward to reinforce the 8th Devons at the cross-roads, but this was not enough to enable the advance party to move further forward. In the meantime, the Germans were reinforcing Hulluch and St Elie, and casualties continued.
At about 9.30pm the enemy attacked the cross-roads in force and the Devons retired to Gun Trench - according to the 8th Devons War Diary, "in the course of which many losses were sustained owing partly to rifle fire and bombing from the enemy and partly from rifle and machine gun fire from the Bedfords in Gun Trench who in the dark mistook friend for foe". Captain Gwynn and 2nd Lt Trott, who had led the 8th Devons during the day, were both wounded. Company Sergeant Major Bryant, who (according to the 8th Devons War Diary) "had prevented a panic from setting in", was stunned by a German bomb when attempting to rescue Sergeant Hansford, who had got cut off during the retirement. According to the Regimental History, at one point the Germans secured a lodgement in the trench, but were counter-attacked and driven out by the 2nd Borders, with whom were many of the 9th Devons and a few of the 8th. But in the end, Gun Trench was secured, with the Germans falling right back.
The remnants of the 8th and 9th Battalions then occupied Gun Trench, with 2nd Borders on their right and 6th Gordons on their left, and during the night were able to improve the position to give protection from rifle fire. At about 5.30am on 26th September, the officers who had been left in reserve the previous day joined the remains of the Battalion, and, the War Diary says, "restored organisation as far as possible".
Elsewhere
North of the 8th and 9th Devons, the British attack met with varying degrees of success. On the 2nd Division front, close to the La Bassee canal, in low-lying ground, the gas had stalled and caused numerous British casualties, and the artillery bombardment had failed to cut the German wire. The attack failed, with high losses.
Adjoining the 2nd Division, the 9th Division, consisting of Scottish troops, faced a heavily fortified position called the "Hohenzollern Redoubt", and behind it, a flattened slagheap, called "Fosse 8". Here, the artillery bombardment was effective. The Hohenzollern Redoubt, perhaps the strongest in the line, was taken by 7.10am; Fosse 8 by 7.30am; and by 8.45am the Lens road had been reached; however, at 5pm, this advanced position was abandoned after concerted German counter-attacks.
North of the Hohenzollern Redoubt, along a part of the front line known as "Madagascar Trench", other Battalions in the 9th Division faced very strong defences which had not been much damaged by artillery bombardment. In this sector also, due to weak and changeable breezes, the gas had been ineffectual. No ground was gained.
Immediately next to the 8th Devons, the 22nd Brigade, including the 1st Bn South Staffordshires, had captured the position called "The Quarries" by 9.30am, but were unable to make further progress towards St Elie.
To the south, IV Corps had some considerable success. The gas release was effective. The 47th Division secured the Double Crassier, a double bank of spoil close to the village of Loos. Northwards, the 15th Division also attacked the village of Loos. Despite the adverse effect of gas, strong defences, including the Lens Road Redoubt (where the Loos Memorial and Dud Corner Cemetery now stand), and heavy casualties, the village had been large taken by 8am. Hill 70, a key defensive position in the German second line south-east of the village, on the Lens-La Bassee road, was then attacked and taken. Some forces then went even further, south into St Laurent, a suburb of Lens, but were pushed back. A German counter-attack at around 1pm was successful in regaining Hill 70. But the village of Loos remained in British hands.
The final division in the frontline of IV Corps was the 1st Division, in the centre of the battlefield on the other side of the Vermelles-Hulluch road. Here, the gas began to move back towards the British trenches, and so was turned off; when it was restarted, the air movement once again caused British casualties, including amongst the men of the Special Companies releasing it. The artillery bombardment had also been ineffective against German defences.
When the frontal attack failed, the commander of 1st Division, Major General Holland carried out a flanking movement, and the German position at Bois Carre, a small copse, was successfully taken from the rear. The 1st Division then advanced to the Lens-La Bassee road, to attack Hulluch, but the assault ultimately failed.
The position thus at the end of 25th September was that, although an advance had been made, the German second line had not fallen, and the anticipated breakthrough had not happened. Reinforcements were required.
The action on 26th September
The release, handling and deployment of the reserves subsequently became a matter of considerable disagreement between Haig and French. The 21st and 24th Divisions were "K3" battalions, inexperienced battalions raised from Kitchener's volunteers. They had landed in France in early September, and were moved from their concentration point at St Omer to Lilliers only a few days before the battle, marching by night to escape enemy observation. Their march towards their advanced positions, still five miles from the front line, intended to take three hours, took double that, due to blocked roads leading to the battlefield. They arrived on the morning of 25th September exhausted.
Sir John French released them to Haig's control that morning, and they were moved up to the front-line overnight. But the Germans, meanwhile, also reinforced their lines, bringing up twenty-two additional battalions. On the morning of 26th September, they launched counter-attacks against Hill 70 in the south, and against the position in "The Quarries" just to the north of the 8th Devons. Hill 70 was held, but "The Quarries" was lost.
At 11am Haig resumed the offensive, along the Lens-La Bassee road, from Hill 70 in the south, through Hulluch, to St Elie to the north. There was little time for a preparatory artillery bombardment and ammunition supplies were short; and this time there could be no gas. German second-line defences were very strong. There was little time to brief the reinforcing troops, who were unfamiliar with the ground and in any case, exhausted. Troops already on the ground had suffered hugely the previous day. In such circumstances it is scarcely surprising that the attacks failed - there was no breakthrough.
On 26th September, the 8th and 9th Devons remained in position in Gun Trench all day. They were not directly attacked but were subject to unaimed fire from elsewhere, causing one casualty.
From 27th - 29th September
At 10pm the 8th Devons were relieved in Gun Trench by the 2nd Bn Royal Scots Fusiliers and received orders to occupy a British trench called "Curley Crescent". However, when they got there it was already full, so eventually they found a space in the old support line. Here they "spent three very uncomfortable days" while fierce fighting continued along the front line; "all ranks very tired and very dirty and weather was very bad". Stragglers came in until the Battalion was about 130 strong, according to the War Diary; the 9th Devons were better off, at about 200.
On 29th the 8th Devons were told that they were to move to the front line to be ready to attack as the Hohenzollern Redoubt had been retaken, but when they moved up to the new front line they were told that this was untrue and that they were to march back to billets at Beuvry. They reached there at 2am on 29th September. There, they were able to take stock and conduct the first roll call since the battle. On 30th September, according to the Regimental History, their fighting strength was 6 officers and 263 men; that of the 9th Devons was 12 officers and 325 men.
On the front-line, action on 27th September concentrated on resisting German counter-attacks, especially on the Hohenzollern Redoubt, and on consolidating the front line. On 28th September, Haig deployed the Guards Division in a further assault on Hill 70, which failed.
General Foch then agreed to move up a French Corps to take over the line at Loos and take on the assault at Hill 70, while the British concentrated on the positions to the north. A final Allied offensive was launched on 13th October. It too failed.
Aftermath
After three weeks of battle, British casualties totalled 50,380, with 6,350 dead. For the 8th Devons, the losses had been very high - 19 officers and 620 men, of whom 148 were killed, 129 were missing, and 343 wounded or gassed. The 9th's losses were fewer - 15 officers and 461 men, of whom 59 were killed, 76 were missing and 326 wounded.
Another, rather different, victim of Loos was Sir John French, in whom the government, the King, and other senior military officers had lost confidence, and whose position by mid-October had become impossible. Haig used French's failure to send up the reserves in good time or in good condition as his justification for failing to support French remaining in command. French was appointed Commander in Chief Home Forces, and on 8th December 1915, Haig himself became Commander in Chief of the BEF.
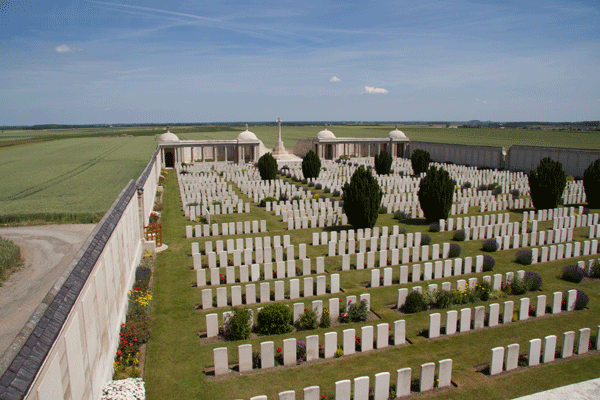
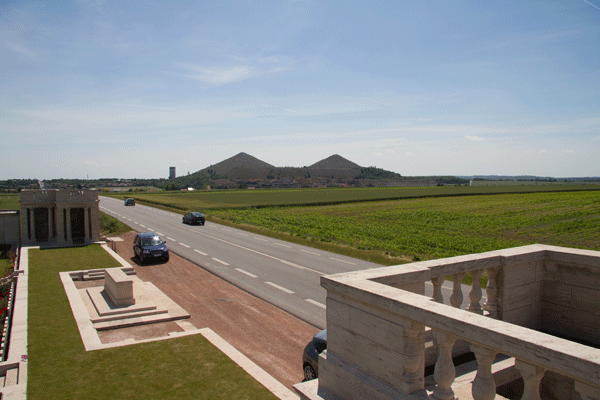
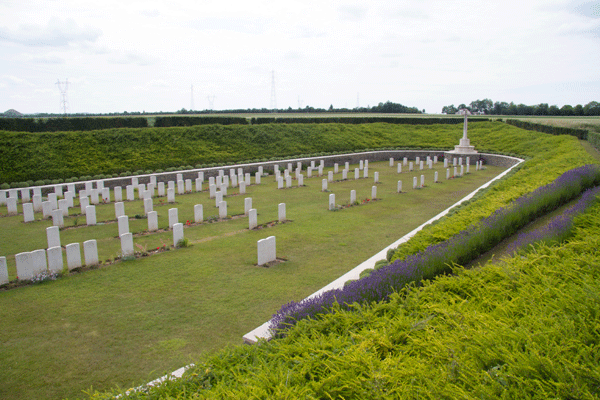
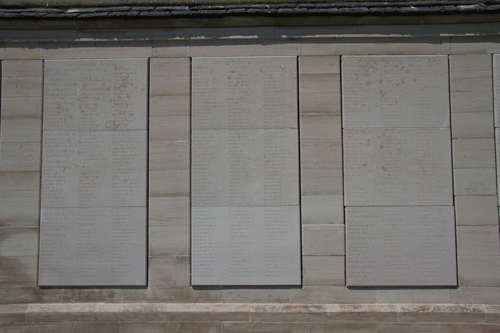
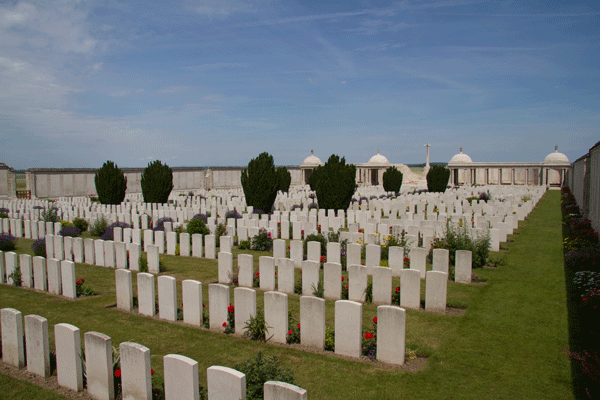
The Loos Memorial
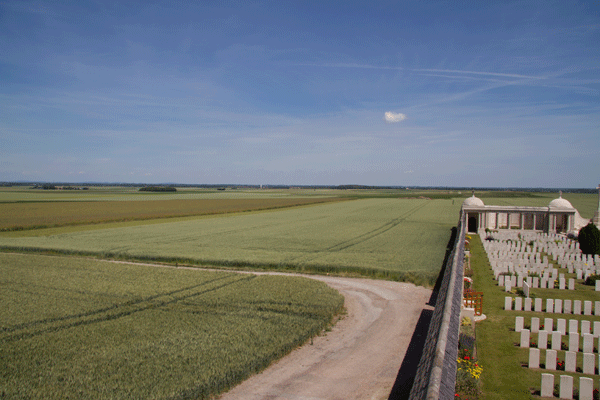
The Loos Memorial to the Missing forms the rear and the two sides of Dud Corner Cemetery. The site on which it was built is close to a strongpoint in the German front line called the "Lens Road Redoubt". The British front line crosses the Lens Road just to the north-west of the Memorial.
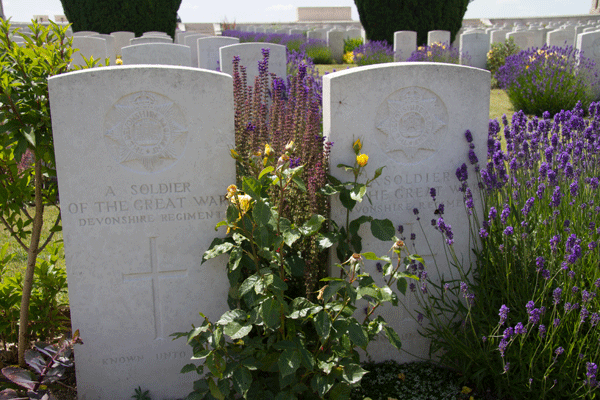
Many of those who died in the battle fell in what became the new No-Man's-Land between the front lines by the end of the battle. After it, the front lines changed very little in the sector and it was not possible to recover or bury many of the fallen until the battlefields were cleared from 1919.
Further, at this time, the majority of British servicemen were only issued with one identity disc, which was, if possible, removed from fallen soldiers in order to establish a figure for battle casualties. There were thus many unidentified bodies, even if they had been buried in marked plots.
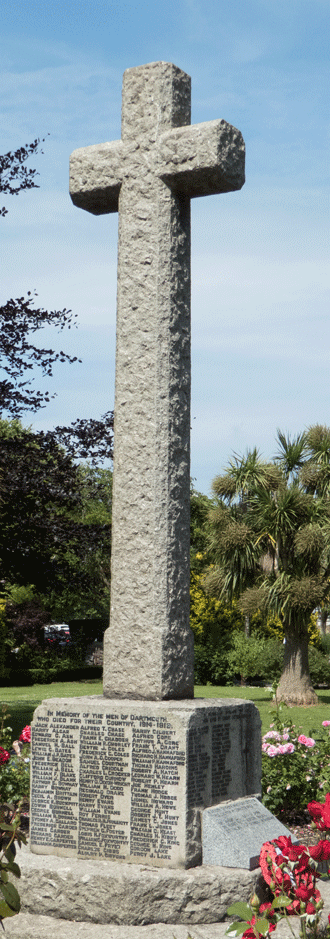
All of the men from Dartmouth of 8th and 9th Devons killed at Loos, or who were presumed to have been killed there, are commemorated on the Loos Memorial to the Missing.
Sources
Loos 1915, by Peter Doyle, publ by The History Press, 2012
The War Diary of the 8th Battalion Devonshire Regiment, available for download from The National Archives (fee payable) reference WO 95/1655/2
The Devonshire Regiment, 1914-1918, by C T Atkinson, publ by Eland Bros, Exeter, and Simpkin, Marshal, Hamilton, Kent & Co Ltd, London, 1926
The Good Soldier: The Biography of Douglas Haig, by Gary Mead, publ by Atlantic Books, 2007